


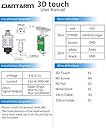
Official GEEETECH Auto Bed Leveling Sensor, 3D touch sensor for 3d printer
Product ID: 100630879
Details
- BrandGIANTARM
- Item weight0.08 Kilograms
- UPC611559980943
- Voltage5 Volts
⚡Self-test feature
📏0.005mm precision
🧲Magnetic Hall sensor
🔧 Elevate Your 3D Printing Game!
The Official GEEETECH Auto Bed Leveling Sensor is a cutting-edge 3D touch sensor designed to enhance your 3D printing experience. With its magnetic Hall sensor technology, it offers exceptional precision and a range of intelligent features, including self-testing and alarm notifications. Weighing just 80 grams, this sensor is easy to install and compatible with various 3D printers, making it a must-have for any serious maker.
| Brand | GIANTARM |
| Item weight | 0.08 Kilograms |
| UPC | 611559980943 |
| Voltage | 5 Volts |
M**G
Take your time.. it'll be fine
So, this did take many many attempts to get it right!! Lots of searching for videos online, seeing how it works... Now I've finally got it working it's amazing. No more levelling the bed and twisting those screws. Perseverance is needed though. Firstly, had to upgrade A10M firmware to 1.1.9 touch. Once that's installed and you've followed the online video on how to connect the touch you then need to do the following: - Auto home the sensor - It'll probably show you at the end (Prepare->Move->Z axis) that it's about 10mm. Stick a piece of paper under the nozzle, go back to Control->Movement and set the Z axis offset to -2.5mm. Then go back and auto-home and then take z axis down from 12.5mm (which will now be shown) to zero. Slip the paper between the nozzle and bed to see if there gap is enough (when the paper bites). If not, go back to Control->Movement and move the z axis offset up or down Once you have the z axis offset right, there's a "store settings". Click that and you're good to go. Then prepare->autolevel bed (or something like that). It takes time, but it's time well worth taking!
J**M
Very reasonably priced Auto Bed Leveling Sensor
Very well priced sensor. Made by a company that has their hand in lots of 3d products. Packaging was excellent, very happy with it. Included with the package were some pins and other bits and bobs. The wires were however quite short, but very easy to extend with the included depont connections. Once connected the instructions found on their website were helpful. I used a couple of YouTube video guides to finalise the firmware. I used this on my Creality CR10S with an SKR Mini E3 Mainboard. Marlin 2.0.5.3. 36 point mesh, seems to have detected the bed correctly and made a decent mesh. I used a Setsana 5015 and BLtouch/3DScan hot end shroud. This 3DTouch fit perfectly. I also noted that the wires are built into the unit, which stops any issues that may arise from them being pulled out due to tension on the wires. Over all I'm very impressed with this 3DTouch. I'll potentially be buying 2 more to be mounted to my Raise3D N2 and Anycubic i3 Mega S.
C**R
Accurate and Easy Levelling
The Geeetech 3D Touch (it is a BL Touch clone) is an ideal companion to the Geeetech A10M dual extruder 3D printer, but there are a couple caveats. In the box you get the 3D Touch module, some screws to secure it to the print head and some plug components for installing on none Geeetech printers. The first thing missing though is any instructions on how to install it. For this, you need to head to the Geeetech website where you can download an updated firmware with 3D Touch compatibility and the toolkit to allow the firmware to be uploaded to the printer. Geeetech also sent me a link to a YouTube video which walked through the installation (although it was unfortunately in Spanish so I couldn't understand what was said). The process is fairly easy. After installing the firmware, the module is mounted and plugged in to the 2 connectors on the hotend. It needs to be mounted about 2mm higher than the nozzle when the 3D Touch is parked (pin us up). Once this is done, the Z offset needs to be set to the correct setting for how the 3D Touch is mounted - in my case it is an offset of -1.5mm and I just followed the process in the shown in the video. In use, the module does a 9 point levelling using the auto level function in the updated firmware. When printing, it has only done a single point level but the level of the print I did was very good - the video shows it working, except I had the printer set to 50% extrusion initally so it didn't stick to the bed until I set it back to 100% (user error not printer). When the printer is working, the 3D Touch is parked and doesn't interfere with the print either. Overall, a very worthwhile addon, and it is just a shame Geeetech didn't fit it to the A10M as standard. For this module, it would be better if Geeetech could add some instructions, or at least provide links to them in the box.
E**D
Geeetech Bed levelling sensor
Fitted this to my geeetech A10m I found fitting was easy but it didn’t say that you have to upgrade the firmware it won’t work if you don’t I looked at some films showing how to do it and great it works well I had a lot of help from customer Care with out l would have struggled
G**W
Terrible repeatability, do not buy
I've had no end of issues after fitting this as I'd always have first layer issues, even went as far as getting a dial gauge and checking with my own eyes, and now have confirmation after forking out for a proper BLtouch 3.1. Here's the proof: 1st mesh (preheated bed for 5 minutes) 0 +0.084 -0.336 -0.369 +0.149 +0.134 1 +0.547 +0.492 +0.339 +0.412 +0.312 2 +0.644 +0.399 +0.312 +0.324 +0.069 3 +0.657 +0.442 +0.167 -0.044 +0.202 4 +0.632 +0.076 +0.132 +0.122 +0.179 2nd mesh (after a further 5 minutes of bed heating) 0 -0.299 -0.466 -0.464 -0.354 +0.061 1 +0.372 +0.257 +0.209 +0.127 +0.039 2 +0.447 -0.069 +0.212 +0.127 -0.191 3 +0.499 +0.264 -0.099 -0.194 -0.101 4 +0.157 -0.101 -0.039 -0.126 +0.009 I get a whopping +/- 0.4mm variance between probes - 3+ layers. Notice how even the middle, which is done after a home using the probe, is somehow +0.3mm out.... Here's the same bed, same mounting point, same preheat, same time to heat. using a BL touch instead: 0 +0.169 +0.011 -0.039 -0.074 -0.024 1 +0.146 +0.014 -0.041 -0.076 -0.041 2 +0.227 +0.056 +0.001 -0.059 -0.044 3 +0.252 +0.061 -0.019 -0.041 -0.091 4 +0.267 +0.046 -0.061 -0.109 -0.139 2nd: 0 +0.167 +0.009 -0.041 -0.076 -0.016 1 +0.149 +0.011 -0.044 -0.074 -0.036 2 +0.219 +0.056 -0.006 -0.074 -0.054 3 +0.242 +0.056 -0.024 -0.051 -0.111 4 +0.252 +0.041 -0.076 -0.119 -0.159 0.02 variance max. Half the minimum (magic) number of 0.04mm Just avoid - you get what you pay for. If a probes repeatability is +/-0.5mm, it's more trouble than its worth.
T**N
It does its job just
What can I say it works a little tricky to set up and has had a few moments when it decides not to work but for half the price of the BLTouch it does the same job and works and no more bed leveling. The bigest thing for me is being able to swap build surfaces and only have to run a quick bed mesh and its ready to go again.
M**T
Superb product
Item arrived well packaged, and following Geetechs own install video was pretty simple to add on, If you get stuck there are many other videos and articles to help. The auto bed leveling certainly helps as manual I can only do the 4 corners leveling method, this measures from 9 points so a much better bed leveling experience. I certainly have no problems recommending this product to other people, spot on :)
L**E
Takes the stress of leveling after every print away
I've got the geeetech A10M and that comes with the attachment for this 3D touch. I used some of the smaller screws and nuts to fit mine as it blends in better. Fitment was easy and after a quick firmware install and 3d touch adjust followed by the Z axis. offset adjustment away it went. Got a great print from it and the first layers were superb. You may need a tweet here and there but once set up its worth spending the extra few moments getting it just right. There's loads of YouTube videos to help set up as well as the geeetech online vid/instructions. Comes well packaged in a box and anti static bag. Well worth it.
M**2
Parfait!!
J'ai acheté il y a un moment déjà une imprimante 3D GEEETECH A10M, et meme si j'arrivais a mettre le lit a peu près de niveau j'ai craqué pour ce 3DTOUCH. J'ai vraiment beaucoup aimé la facilité d'installation car sur la A10M le 3DTOUCH s'installe au niveau du chariot sur la petite carte imprimée. En revanche niveau configuration j'ai mis quand même plus d'une semaine pour arriver à quelque chose. J'ai même songé a renvoyer le matériel pensant qu'il était défectueux. Mais en fait lorsque j'ai mis à jour le marlin je m'étais trompé de IDE arduino... pour le marlin 1.1.8 il faut bien utiliser l'IDE arduino 1.8.5! Mais ce n'étais pas tout j'ai aussi remarqué que mon axe des X n'était tout a fait droit et comme le 3DTOUCH part du principe que le X est parfait... Une fois tout ceci réglé (l'ace des X, la version du marlin et le reglage de l'offset) il suffit de mettre la commande G29 dans le script de lancement d'impression et hop! Le 3DTOUCH vient palper le plateau et l'impression se lance ensuite. Maintenant je ne me soucis meme plus de comment se passe l'impression je la lance et je reviens quelques heures après. En bref je recommande!
�**�
buon upgrade ma non di vitale importanza
Questo BLTouch di Geetech ha migliorato la mia stampante FDM Longer LK4 Pro rendendo il livellamento automatico e preciso, eliminando la necessità di regolazioni manuali. Ha migliorato la qualità delle stampe, garantendo strati uniformi e riducendo i difetti. Un altro beneficio significativo è stato il risparmio di tempo grazie all'eliminazione del processo di livellamento manuale. Consiglio vivamente questo upgrade per semplificare il processo di stampa e ottenere risultati migliori.
F**W
Difícil de instalar, pero merece la pena
La instalación inicial fue un desafío ya que requería modificar el firmware de la impresora. Mi impresora es una Anycubic I3 (tipo la Anet A8, no es la mega) así que no encontré firmware escrito para ella, tuve que modificar el mío propio. Es probable que tu encuentres versiones modificadas del firmware en Github para modelos populares, como la Ender 3 Después de configurarlo correctamente, utilicé el comando M48 en Pronterface para realizar algunas pruebas y quedé impresionado con los resultados. He conseguido primeras capas casi perfectas. Este es el segundo sensor3D Touch que he comprado, el primero lo instalé en mi otra impresora hace aproximadamente un año. Estoy contento con ellos, a pesar de la instalación inicial complicada, los resultados han sido excelentes y han mejorado significativamente la calidad de mis impresiones en ambas impresoras.
T**S
Good quality, Fast delivery.
Quality sensor, as described. Added this to my Ender-3, no problems with sensor.
J**R
Ein unbedingtes MUSS für den Schmelzer
Mit dem Kauf meines 3D-Druckers A20M stand es außer Frage, dass ein Nivellierungssensor angeschafft werden sollte. Nivellieren (besser rumfummeln) jedes Mal bei beheiztem Bett und Düse mit Papier zwischen dem Bett (60°C) und Düse (210°C) ist keine Freude, da man sich ständig verbrennen kann. Das nervt und man wird faul, das notwendige Nivellieren durchzuführen. Es ist bekannt, dass ein gut nivelliertes Bett wesentlich zur Verbesserung der Druckqualität beiträgt. Beide Argumente ziehen bei dem moderaten Preis des 3D-Touches von Geeetech erst recht. Verpackung und Inhalt In der Warensendung waren der Sensor und Stecker-Klemmen sowie ein Widerstand enthalten, um den Touch ggf. auch an andere 3D-Drucker, als die von Geeetech, anschließen zu können. Verpackung und der Touch selbst machen qualitativ einen sehr guten Eindruck (siehe Foto). Es liegt keine Anleitung zur Montage und Anschließen bei, da dieses Teil in die Kategorie DIY fällt und es hunderte Drucker gibt, wo der Anschluss immer etwas anders sein wird. Daher ist ein Blick in die Foren des Internets wichtig, da sich dort sicher eine Anleitung befinden wird. Montage Die Montage ist sehr einfach. Hat man einen Geeetech-Drucker, ist die Halterung bereits seitlich am Hotend montiert. Bei Fremdprodukten empfiehlt sich der Blick ins Internet. Oft werden druckfähige Dateien angeboten, wo man dann mit dem eigenen Drucker das Befestigungsteil gleich selbst herstellen kann. Mit zwei Schrauben ist der 3D-Touch befestigt und die Verkabelung erfolgt nach Vorgaben des jeweiligen Herstellers. Bei Geeetech sind die Steckelemente schon vorbereitet und die Kabelenden brauchen nur noch die Steckplätze belegen. Die Höhe des 3D-Touch-Stiftes über dem Bett sollte lt. Hersteller ca. 3 mm betragen /siehe Foto). Der korrekte Wert wird dann mittels Bedienfeld eingestellt. Das Druckbett ist wichtig für den Einsatz des 3D-Touches Alle Drucker werden mit einem Druckbett ausgerüstet, meist foliert bzw. beschichtet. Viele User beklagen sich, dass die Drucke schlecht vom Bett abgehen, meist sind unebene Betten daran schuld. Ich habe mein Alugussbett mit einer zugeschnittenen Glasscheibe aus Borosilikat (siehe Amazon-Sortiment) versehen, auf das ich UHU-Kleber aus dem Stick dünn auftrage und dünn verteile. Das haftet hervorragend, Teile gehen bei < 40°C bestens ab und ab und zu kann das Bett mittels Wasser gereinigt werden. Der Vorteil ist für das hier beschrieben Nivellieren, dass eine 3 mm-Glasscheibe weitestgehend eben ist und selbst beim Abschaben von Filamentresten nicht leidet. Das bevorteilt die Arbeit mit dem 3D-Touch. Software Die Aktivierung des 3D-Touches erfolgt über eine Software. Die meisten Drucker verfügen über die Marlin-Firmware. Auch hier sollte man sich in Netzt erkundigen, wie die Einstellungen zu erfolgen haben. Die Erfahrungen zeigen, dass es meist sehr viele Anleitungen gibt; gewisse Grundkenntnisse im Umgang mit Hard-und Software sollte man schon besitzen. Ist der 3D-tuoch und montiert und die richtigen Einstellungen in der Software gemacht worden, muss er nivelliert werden. Da im Netz diesbezüglich nicht sehr viele Anleitungen existieren, möchte ich mein Tutorial dazu hier veröffentlichen. Es bezieht sich auf Firmware Marlin: Düsenhöhe kalibrieren Zuerst den Drucker einschalten und mit dem USB-Kabel zum PC verbinden. Dann einen Slicer, wie Simplify3D, Cura oder Repetier Host öffnen und zur Eingabemöglichkeit eines G-codes wechseln. Dort mit dem Drucker verbinden. Jetzt über das Bedienfeld des Druckers das Bett und das Hotend auf tatsächliche Drucktemperatur hochheizen. Diese Temperaturen während der gesamten Nivellierung beibehalten. Danach von der Düse jegliches Filament entfernen. Sendet aus dem Slicer einen G-Code -> “G28” für die Home-Position. Es kann sein, dass der Drucker nun in die Mitte des Betts fährt. Nach “Home” ein Stück Papier unter die Düse legen und mit dem Bedienrad am Drucker solange in -1.0 oder -0.1 Schritten nach unten fahren, bis das Papier an der Düse kratzt (Achtung: Düse und Bett sind aufgeheizt!). Jetzt den Wert, der am Display bei Z steht, notieren - z. B -2.01 und danach im Slicer den G-Code-Befehl “M851” eingeben, um den EPROM-Wert im Slicer auszulesen. Dort sollte in einer Zeile, die mit “M851” anfängt ein Wert stehen, z.B. M851 Z-0.20. Rechnet den oben am Display abgelesenen Wert mit dem M851-Wert zusammen, z.B. -2.01 + -0.20 = -2.21. Diesen neuen Wert nun per G-Code Befehl aus dem Slicer an den Drucker senden: “M851 Z-2.21“ Danach per G-Code-Befehl “M500” die Daten im EPROM sichern. Zur Überprüfung wiederholt den G-Code Befehl “G28” an den Drucker senden und danach ein Papier unter die Düse legen und wieder die Z-Achse per Drehrad in -1.0 - oder -0.1 - Schritten nach unten fahren, bis das Papier kratzt. Jetzt sollte im Display bei Z der Wert „0“ stehen. Hinweis: Sollten sich geringe Abweichungen ergeben, könnte man die Düse bei der Höhe „Z0“ in alle vier Ecken fahren und dort jeweils den Papiertest durchführen und ggf. mit der Stellschraube den Tisch nivellieren. Fertig! Jetzt testen, ob der 3D Touch richtig arbeitet. Fazit Kalibriert wird unter Arbeitsbedingungen, also im Aufgeheizten Zustand von Düse und Bett. Der 3D-Touch ist für den „Schmelzer“ ein unbedingtes Muss. Die Nivellierung erfolgt an 9 Stellen des Druckbetts, man kann aber in der Software die Anzahl beliebig erhöhen. Das komplette Nivellieren sollte man aller 10 Arbeitsstunden des Druckers durchführen. Da die Nivellierung in der Mitte des Drucktischs vor jedem Druck erfolgt, wird die aktuelle Betthöhe in den Rechenprozess einbezogen und Unebenheiten ausgeglichen - mehr optimale Sicherheit geht nicht mehr. Der Preis ist gering gegenüber dem Nutzen, die Installation schon etwas komplizierter. Daher vorher richtig gut recherchieren und die Foren, in denen jeder User etabliert ist, auf Erfahrungen abklopfen. Ist dieses Hilfsgerät einmal installiert, wird es Freude bereiten, Zeit und Verbrennungen sparen und beste Druckergebnisse liefern.
Trustpilot
1 month ago
1 month ago